I’m in several online gardening groups and I’ve seen quite a bit of confusion surrounding cross pollination. Hopefully, this will help clear up some confusion around cross pollination.
What is Cross Pollination?
Cross pollination is when pollen from 1 plant, fertilizes the flower of another plant of the same species.
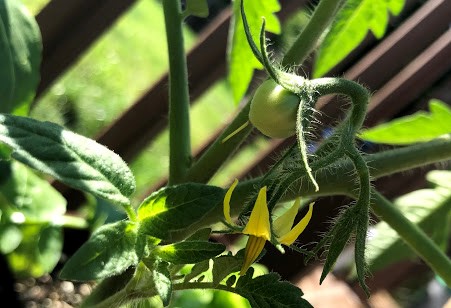
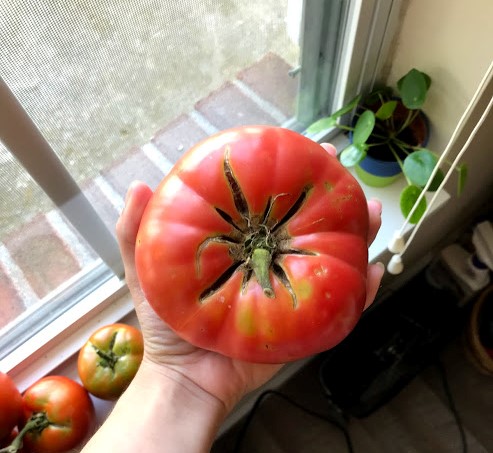
Meaning, if I had a red tomato plant next to a yellow tomato plant. A bee could come along and move the pollen from the yellow tomato to the red.
This doesn’t mean your red tomato plant will produce yellow tomatoes. At least not yet. IF you save the seeds from that red tomato, you may end up with yellow tomatoes. And IF you plant those seeds next year will you have the chance of having a yellow tomato from your red tomato seeds.
Your fruits for this growing season will NOT CHANGE if cross pollination occurs.
Here a few concepts that are important for understanding pollination.
Self-pollinating: Plants that are self pollinating have both male and female parts. The flowers can pollinate themselves, without the need of insects moving pollen from one flower to another. Example: tomatoes,peppers, peas, and beans are all self-pollinating.
Family: “A category of taxonomic classification ranking above a genus, forming a group of plants that includes one or more similar genera”(Seed to Seed by Suzanne Ashworth).
Genus: “a category of taxonomic classifications ranking above a species, which forms a group of closely related species” (Seed to Seed by Suzanne Ashworth).
Species: “The units of taxonomic classification into which a genus is divided, each of which forms a maximum interbreeding group of plants that is re-productively incapable of crossing with other species” (Seed to Seed by Suzanne Ashworth).
Variety (abbreviated var.) – “Closely related plants with nearly identical characteristics which form a subdivision of a species” (Seed to Seed by Suzanne Ashworth).
Myths about Cross Pollination:
Myth #1: “Don’t plant hot peppers next to sweet peppers, they will make them hot”
While there is some truth to this, your sweet peppers will not become hot by being near hot peppers. If and only if you save and replant the seeds from those fruits is there a chance your sweet peppers will be hot.
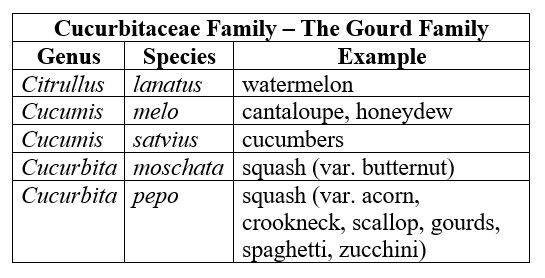
Myth #2: “Squash will cross with watermelon”
I see this ALL the time, it has actually started to irritate me. Plants can only cross if they’re in the same species. The only thing squash has in common with watermelon is that it is in the same family. Watermelon and squash are distant cousins, they’re unable to pollinate each other.
Myth #3: “Cucumbers will cross with squash”
Like myth #2, cucumbers are in the same family as squash, but they are in different genus and species.
Rules to Remember:
Cross pollination can only occur between plants in the same species.
Cross pollination effects the seeds of the fruit. Typically, a cross will only be seen if seeds are saved.
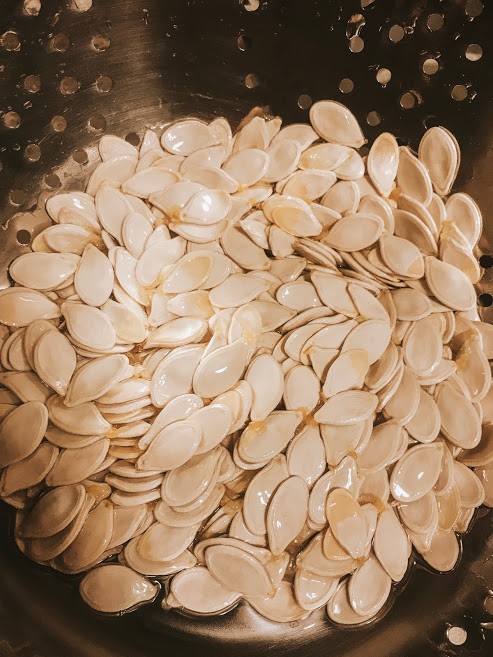
Exceptions to Rule #2: Corn.
Since we eat the seeds of corn a cross will be noticed in the first year. If you plant blue corn next to yellow sweet corn, you will end up with blue and yellow kernels.
References: Seed to Seed by Susanne Ashworth
If you want to see more of my gardens, follow me on Instagram here
I officially finished my 3rd year of college on Wednesday. It was very bittersweet. I’ve decided to transfer colleges for my final year of college. Despite the heartache I face now, I know this is the best decision for me.
For the last two school years, I’ve been an elementary education major. Following my first semester in education, I knew it wasn’t for me. Despite being a passionate learner, I hated school. It took a lot out of me mentally to pursue something my heart was not in to. Still I pushed through, determined to finish. I longed to finish school, but dreaded becoming a public school teacher. I felt no relief or comfort the closer I got to graduation.
I poured myself into gardening for a sense of comfort. I kept wishing their was a way for me to pursue that love somehow. Whenever I got the chance, I let that love shine through, through self-designed papers and projects. However, I was simply in the wrong major for anyone to share in that love.
This made my heart hurt more. My heart was being torn in two.
For 2 years I prayed for comfort and a solution. Then this last February, I decided to look into transferring. I continued to pray. It wasn’t looking hopeful. In order to stay in elementary education at this other school, I would need to go another 2 1/2 years. This was not possible. I prayed some more and poured myself into the things I did love.
Then 2-3 weeks ago, something clicked. I saw the finish line. I found a way to get out of my education track and finish my bachelor’s degree with minors in things I am passionate about. Even though I don’t have all the answers I still feel excited about what is to come. I know that comfort, that peace that overwhelmed me when I saw the finish line, meant I was making the right decision.
If you know me, you know I push myself hard. I knit pick every project before I turn it in, scouring over every detail. This trait is nearly lethal. My expectations are high, failure simply isn’t an option. For years, I struggled with taking a chance on myself, for fear of failure. Even though my outlook towards gardening is the exact opposite.
Failure is simply the opportunity to try again.
While this path is not has clear cut as getting a degree in elementary education, I know that I will trust myself and God to lead me through the chaos.
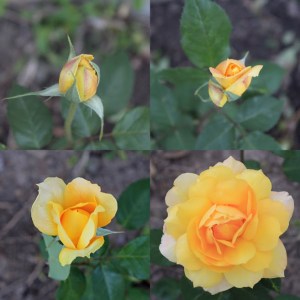
Above is a collage of the a rose blooming. It took days, but when it finally opened, my breath was taken away. Things that are worth while take time. The process to reaching our dreams takes time. I must trust the process.
Ephesians 3: 20 “Now to him who is able to do immeasurably more than all we ask or imagine, according to his power that is at work within us.”
Follow my blog for more posts about life, gardening, and cooking!
Follow me on Instagram to see more about what I’m growing and cooking!
How can we as educators teach students about where their food comes from, when we live in a world where what we eat comes all over the world?
According to Center for Urban Education about Sustainable Agriculture (CUESA), “It is estimated that the meals in the United States travel about 1,500 miles to get from farm to plate”.
How far food travels isn’t something that the average American thinks about. In the U.S. when we need food we will most likely go to the grocery store. There is a severe disconnect between the people who grow food and the average person in the U.S..
This topic is meant to bridge that gap.
What is the project?
I will be creating a map of the foods that were found at my neighborhood supermarkets. I will be noting where they came from and how far they traveled.
Then I will be discussing ways you can incorporate food education into your own classroom.
Why is it important to teach about where our food comes from?
We live in an era where we are globally connected in different ways. We can travel from various countries fairly easily. 100 years ago if we wanted to go to Europe we would have to travel by boat. Now we can hop on a plane and be there by the next day. Food from all over the world can now travel long distances to reach our plates. We can eat bananas year round, even though bananas can’t grow naturally in Indiana.
As a human race we are all connected through food. We all need it. Scientists and politicians are constantly trying to find new ways to feed the Earth’s growing population. We’ve been given a luxury of eating tropical foods all year round, but what if that’s the problem? What if the solution is simply diversifying the foods that we can grow in our own countries?
As educators it is our job to foster the young minds of tomorrow’s world leaders. We need to give them the opportunities to question the status quo. They need opportunities to problem solve given real life circumstances.
Why am I passionate about this project?
As a gardener, I love the environment. It’s important to know how far our food is traveling to get to us. Eating more food locally grown, reduces our carbon foot print and is more sustainable. When we educate people about the effects of our food choices, the more informed decisions they will make when it comes to buying food from the supermarket versus supporting the local organic farmer/grower.
Data Analysis: How far did my food travel?
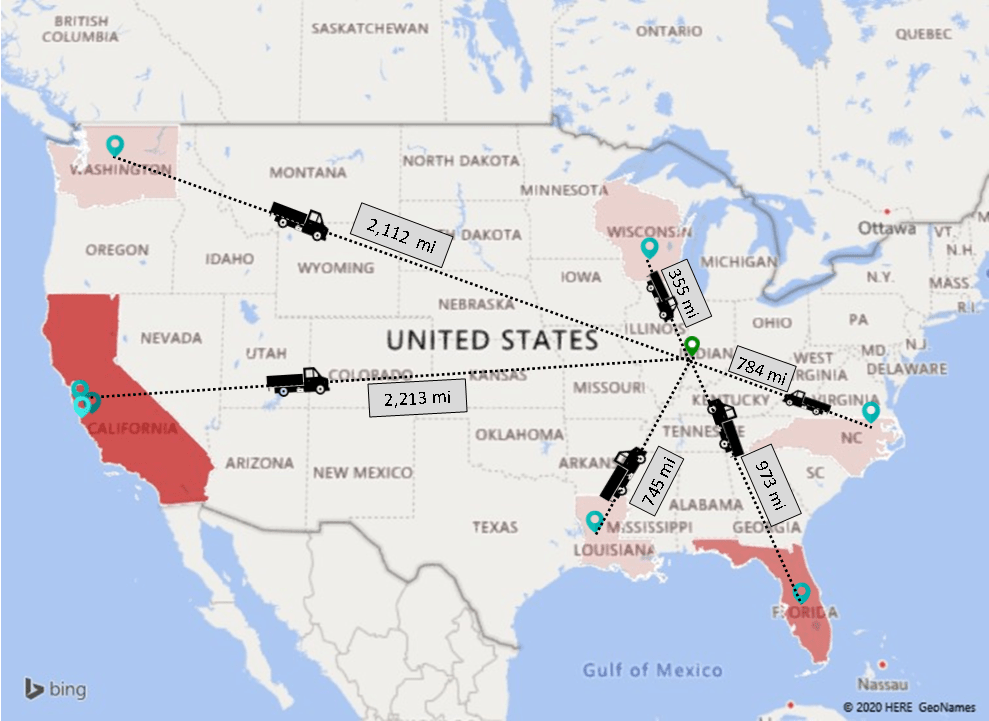
I have created a map of the popular fruits and vegetables in the U.S.. I went to Meijer and noted where each item was grown or packaged.
Not all of the produce gave which state it was grown in. I have created a map based on the states and cities the produced stated where it was grown or packaged in.
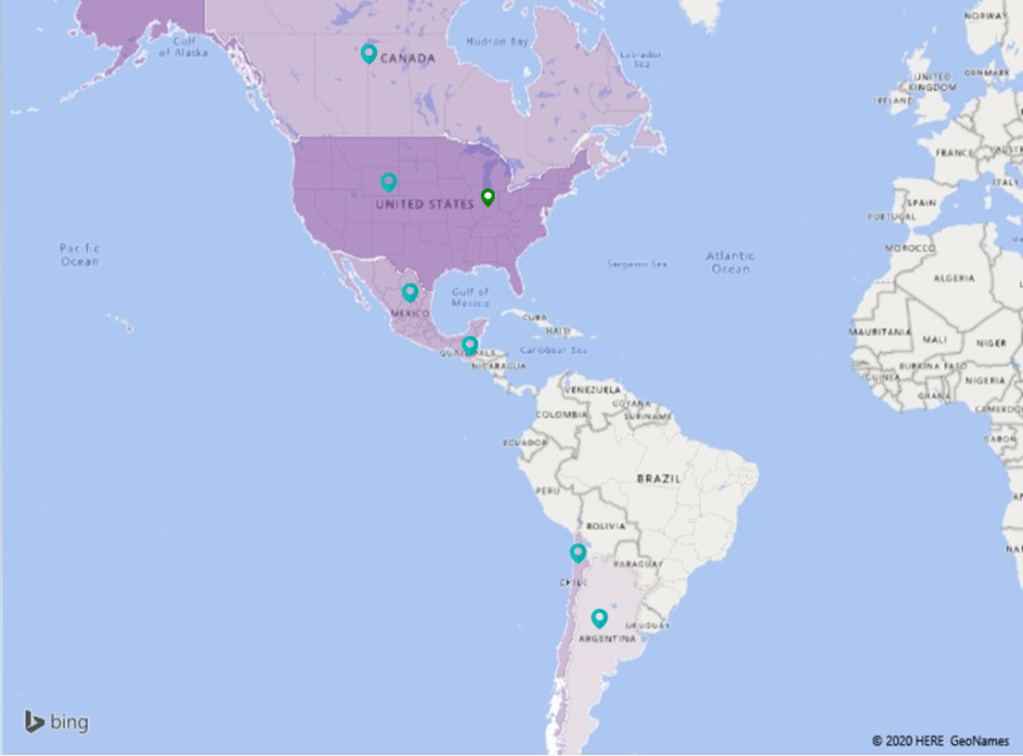
Green marker is where I am, blue markers are cities/states where food was imported from.
I also created a map of the countries where our foods came from.
Green marker is about where I am. Blue markers are countries where the food I examined came from.
*The locations will vary depending what season you are in and where you are located. I gathered my data on March 17, 2020.
Here is a list of the fruits and vegetables I researched.
Fruits
Bananas
Apples
Strawberries
Grapes
Oranges
Watermelon
Lemons
Avocados
Peaches
Blueberries
Tomatoes
Pears
Bell Peppers
Peanuts
Vegetables
Potatoes
Onions
Carrots
Broccoli
Lettuce
Celery
Salad Mix
Cucumbers
Mushrooms
Garlic
Cabbage
Spinach
Sweet Potatoes
Corn
*I have used the botanical classifications of fruits and vegetables for this project.
Of the 28 produce items I examined:
17 of the 28 foods were grown in the USA.
Our foods came from 6 different countries: USA, Canada, Mexico, Guatemala, Chile, and Argentina.
10 of the 17 United States grown food listed the state it was grown in. Of those 10, 5 of the foods were grown in California.
Findings of where fruits were imported from.Findings of where vegetables were imported from.
Teaching Students about Food:
How can you incorporate this topic into your reading lesson?
Before going into detail about how far fruits and vegetables travel to get to our plates. Make sure the students understand that fruits and vegetables come from plants, possibly discuss what makes something a “fruit” and something a “vegetable”. Make sure you follow botanical classifications, not culinary classifications. They are different. Botanically, tomatoes and peppers are fruits, because they form from the flowers of the plants. Vegetables are leaves, stems, and roots of plants. You may just blow the students minds by telling them that tomatoes and peppers are actually fruits, not vegetables.
Activity: Where did my food come from? Reading and Geography
Materials:
Map of the World
Fruits
Vegetables
Pin point marker (sticker or pin)
Buy enough fruits and vegetables so that there is enough for each student in your class. Then go over how the students can find out where there fruit or vegetable was grown. Discuss how the stickers on the produce says the country it is from.
Grown in Guatemala
The image above is an example of a banana sticker. It tells the reader that it was grown in Guatemala.
After each student has found out where their food has come from give the students a sticker or some type of marker to mark on the map where their food came from. Give the students enough time to find their country/state on the map.
After every student has marked their item on the map, review and discuss what they learned. Talk about which item traveled the most and which traveled the least.
General Food Topics to Discuss with Children
Students, especially students who grow up in urban areas, may not be aware of where/how their food grows. Milk comes from cows, but there’s other kinds as well, such as: goat, almond, and soy. What are these things and what do they look like?
Because the food we eat is so diverse, it is important to talk about animals that produce several common food items, like cows. We get so much food from them. Read a book about cows that is appropriate for your grade level. After reading the book, make sure to discuss appropriate living conditions for cows and products that come from cows.
You can easily create a chart with products that come from cows: milk, cheese, beef, hamburgers, etc. You can also compare and contrast this with other animals/types of food.
Often times teachers talk about people as omnivores and herbivores. Teachers should expand that and also teach the terms vegan and vegetarian as well.
There are a wide variety of topics based around food that you can incorporate into your lessons. Like how does food grow, where does it grow/live, and what foods come from plants and which come from animals.
I recommend reading the book How Do Apples Grow by Betsy Maestro it is about how fruits like apples grow. This would be a great introductory book to read when discussing how plants grow.
Teaching students where their food comes from and how far it travels is important in creating educated well rounded citizens. How can we teach students to love nature, if they’re unaware of the how much it provides for them?
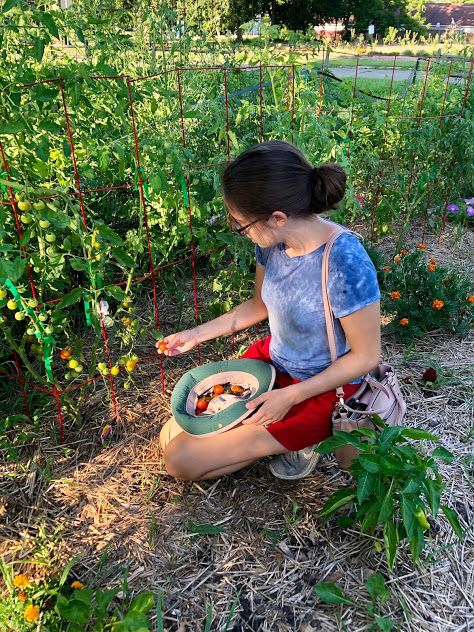
Me in my garden picking cherry tomatoes last year.
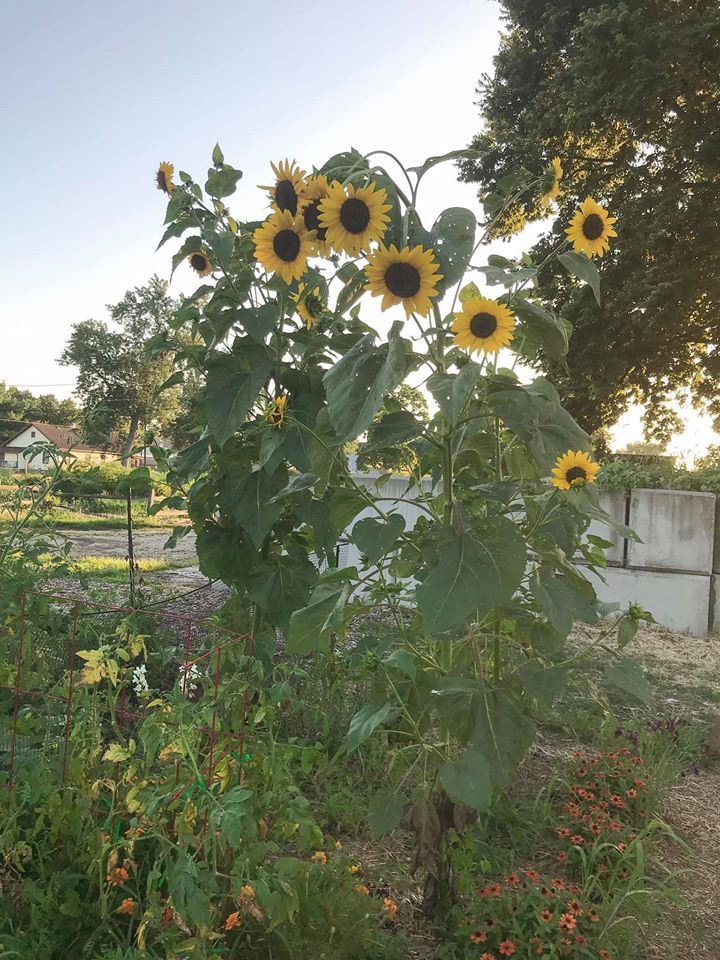
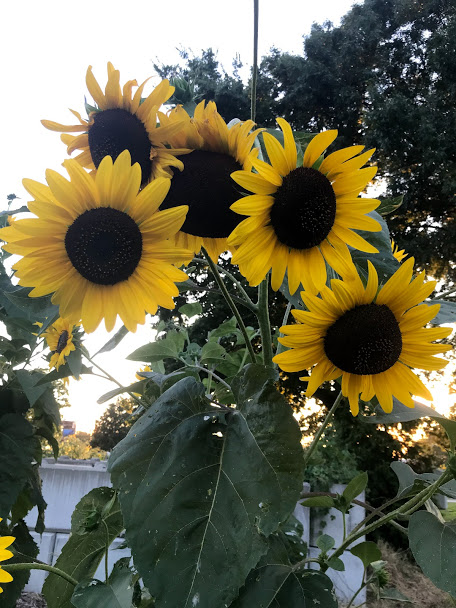
Large yellow volunteer sunflowers that grew in my garden last year.
No matter what is going on in my life, the garden welcomes me with open arms. This is why I encourage everyone to garden at least once in their life.
I have a fast paced brain, I am always thinking about something. It’s very rare for me to be thinking about nothing. I’m always thinking about the next task or what I need to do later. The only time I’m thinking about nothing is in the garden. Words can’t describe the peace the overcomes me in the garden.
Gardening is addicting, gardening makes us (fellow gardeners) feel good. That feeling when the tomato you started from seed is finally ready to harvest, it’s indescribable. That feeling of reaping the benefits of your hard work. Being able to share my harvest is one of the most rewarding things for me.
The other day after setting up my chicken wire garden fence, I took a step back and took it all in. I walked around the community garden and imagined what will be in a short few weeks. Gardeners young and old will be planting their summer crops, hoping for a bountiful harvest.
On my garden walk, I walked among the squirrels, who were completely unphased by my presence. I heard the birds chirping in the trees and I watched them bathe in the rain puddles.
The garden is not mine. Everything that has been and will be in the garden is God’s. The fact that he shares that with me is incredibly inspiring. The garden brings me hope. Hope in the future, because the garden isn’t affected by the current events. The garden reminds me that God will provide to those who put their faith and trust in him.
Unlike people, the garden doesn’t worry about the future, it doesn’t worry about when the frost will come, or if you’ll remember to water it. It is in no rush to flower or fruit. It all happens in its own time. The garden only dies, if you let it die. The garden is patient, it is resilient, and is forgiving.
Like people, if left to it’s own devices, it will become unmanageable. This is why it is important to be a dutiful, patient gardener.
Most of the time, if you make a mistake in the garden it will forgive you. The plants will rebound. No matter what you do, failures are bound to happen. Instead of dwelling on them, they can easily be used as opportunities to learn and grow from.
God is both the garden and the gardener. Like the garden, God does not fear, he is patient, and he is forgiving. He is also the gardener. His words feed us, nurture us, and grow in us, so that we too can be fruitful.
The garden is wherever you make it. No matter where it is or how big or small it is. I’ve had several garden areas now, and my feelings towards the garden have remained unchanged. The garden is my place for seeking solace. In the garden, I am reminded God is like the garden. He is the bringer of hope. He is patient and his love endures forever.
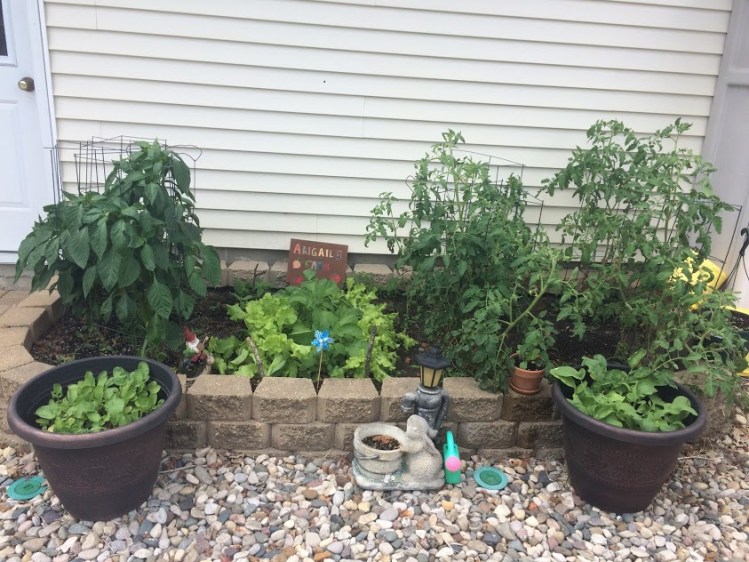
My small garden from 2017.
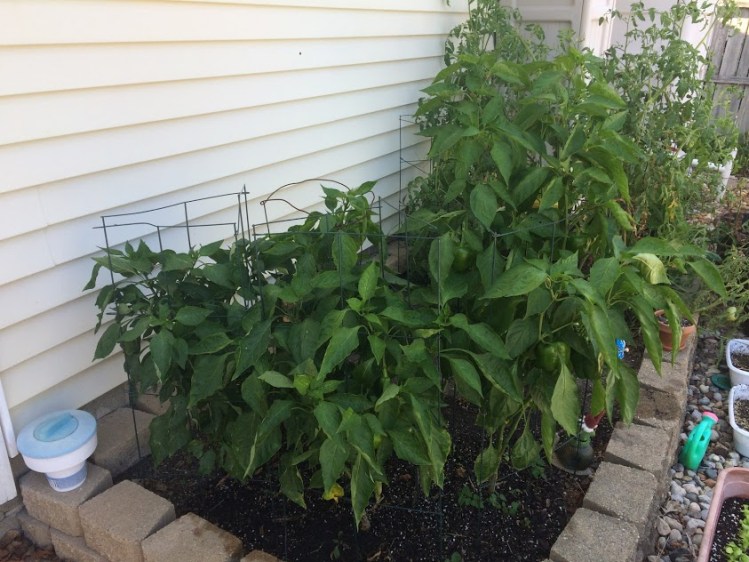
Another view of garden in 2017.
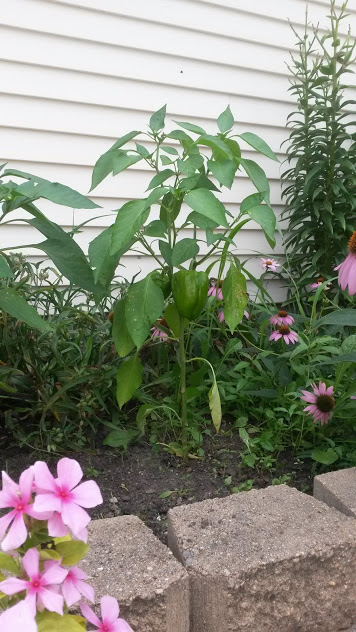
My very first bell pepper plant in May 2015. Only a few inches tall.
My very first bell pepper plant in July 2015, already producing peppers.
If you haven’t read my Phonemic Awareness in the Garden post, go back and read that first. This will be an extenuation of that activity.
If it’s possible, get your hands on some pea pods. If you do not have access to garden fresh peas, you can pick up Sugar Snap Peas from the grocery store (my local Walmart carries them).
Read The Little Pea by Amy Krouse, I have attached a link to listen to the book online.
After you have a handful of peas, talk about them with your child (this helps with oral language development). As them about the texture, the color, if it’s hard or squishy, and etc..
Carefully open up each pea pod and let your child count the number of peas in each pod. If you child has learned how to write his/her numbers have you child write down the number of each pea pod.
Pod 1: _________
Pod 2: _________
If you want to avoid the mess or you want an individual activity here are cards you can print of and download. Counting 1 – 10.
The oldest pea ever found, was in Thailand and it was estimated to be over 3,000 years old!
I recently I had a blog post about starting seeds with kids. If you happened to start peas you’re in luck!
If you’re a homesteading, homeschooling mom or dad, and you want to incorporate the garden in your young child’s life this is for you! This can be easily adapted for your needs.
This activity is intended for children around age 5.
If it’s possible, start pea seeds with your child a few days before this to get them interested in what the little seed they just planted will produce.
To introduce your child to your topic, show them this video about about the “Poddington Peas” who live down at the bottom of the garden.
After getting their interesting about peas, introduce the ABC book LMNO Peas by Keith Baker. If you do not have the book I have attached a digital read aloud for you.
Print out the 4 different pea pod cards. G, P, H, F are the letters on the pea pod cards. Each letter should have 3 peas with imagines the correspond with the sound. For example, the pea pod with the letter f, has a pea with an image
Yesterday, I was informed that for the remainder of the semester my courses will be online. If your school hasn’t closed temporarily yet, it will probably come soon. Along with University and College going online, schools across the country will be closed at least through the end of March. This leaves parents in a position to keep their kids occupied throughout the day.
I hope you are able to get through this tough time together as a family. Despite what is going on, I hope you are able to create life long memories with your family.
As a future educator, I hope that this gives you some inspiration to spend some time with your kids this week and have some fun!
If you didn’t know already, this is the perfect time to be starting seeds! There are a plethora of seeds that will germinate in only a few days.
If you don’t have seeds, you can venture to the garden section of any big box store or check out your local garden center (if they’re open). My local Meijer and Walmart keep the seeds on the opposite side of the store as the food. I was there today and there was maybe 2 other people in gardening section with me.
If you’re avoiding the store, there are plenty of online seed companies that are still shipping seeds. Or ask your friends that garden, I’m sure they will be happy to share.
Here are my recommended seeds to start with kids . If you don’t have seeds on hand already, let your child help pick out what you plant. This will make it more interesting for them.
Most flowers will sprout within a few days. Your children will be waiting with anticipation for the seeds to poke out of the soil.
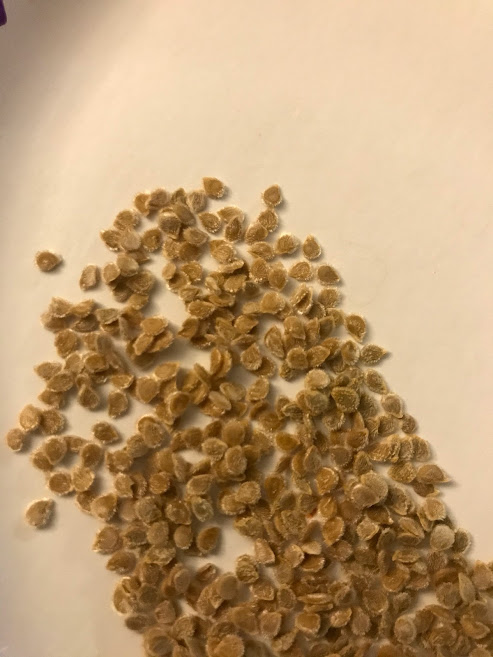
Once you have your seeds, pour some seeds out onto a paper towel or white plate. Let your child look at the seeds and touch them. Talk to them about what they notice. Tomato seeds for example, sometimes have a “fuzzy” texture to them.
Tomato seeds I saved last year
After observing and talking about the seeds, prepare your container (make sure there are holes in the bottom). You can use anything you have on hand. Old yogurt containers, plastic cups, Keurig cups, soda cans, etc. just use what you have.
Label the side of your container with the name of the seed that you planted.
Let your child fill the container with soil. Talk to them about what they think about the texture and anything else they notice about touching the soil.
Poke a hole in the center of you container twice as deep as your seed. Put 2 or 3 seeds in the hole to guarantee at least 1 comes up.
Water in your seeds.
Secure a plastic wrap like saran wrap to your container with a rubber band, hair tie, etc..
Place your cup in a warm sunny window and wait for your seedlings to emerge!
The plastic wrap creates a “miniature greenhouse”. You will not need to water until the seeds emerge from the soil. Once they poke out of the soil remove the plastic.
After your seeds sprout, only water when the soil feels dry.
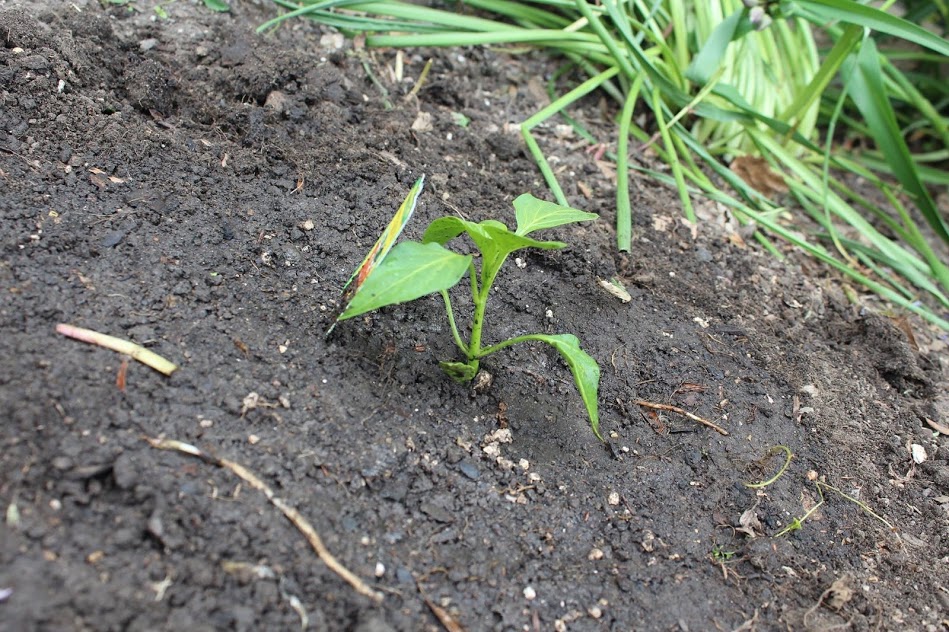
My tomato seedlings a day or so after sprouting. They sprouted about 4 to 5 days after I planted them.
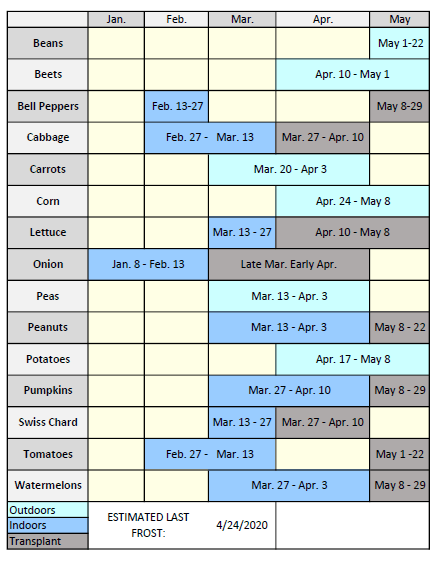
Before you start your seeds indoors, you need to know your last frost date. My last frost date is April 24th. It is generally recommended that you should start tomato seeds 6-8 weeks before your last frost.
Go to Farmer’s Almanac and put in your zip code to find your last frost date.
Then I look at a calendar and count back 8-6 weeks. This is how I decide when I need to plant my tomatoes.
My planting calendar based on April 24 last frost date.
After you figure out your last frost, it is time to plant your seeds. For seed starting you should plant your seeds into a seed starting soil. Seeds do not need any fertilizer to germinate. The seed has all of the nutrients and energy it needs to germinate inside. Your seedling doesn’t need any fertilizer until it has developed its 1st set of true leaves. The leaves that emerge from the soil are cotyledons, they are not true tomato leaves. They will eventually fall off.
I choose to start my seeds in small seed starting cells/pods to start off and will pot them into bigger containers once they need it.
You can start your seeds in larger containers to start, but you run the risk of dampening off (when seedling stops growing and falls over at the base of the stem). The bigger the container you start with, the more water the container will hold. Seedlings start by shooting out 1 root from the seed (called a radical). That one root can’t absorb all of the water that a solo cup can hold. Excess moisture can eventually lead to problems in your seedling. This is why I choose to start in smaller pods.
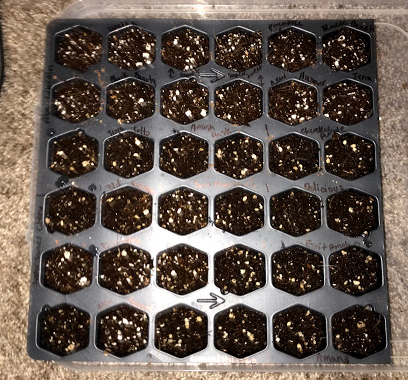
I used a 72 cell tray to start both my peppers and my tomatoes. 36 tomatoes and 36 peppers.
36 cells of tomatoes
Pre-moisten your seed starting mix before you plant your seeds. This will prevent your seeds from moving around after you put them in the hole.
Poke a hole into your soil about 1/4 in deep. Depending on how good your seed’s germination rate is you may need to plant more or less seeds per hole. Generally, I plant 2 seeds per hole. For seeds that are older and have lower germination rates I plant 3 to guarantee one comes up.
After you’ve planted all of your seeds, put your plants in a warm place. Tomatoes need at least 70 degrees Fahrenheit to germinate. I use a heat mat to keep mine warm.
If you do not have a green house you will need to put plastic wrap or a humidity dome over top of your plants in order to keep moisture in. I keep mine in a little 5 shelf green house in doors, so I do not put a dome on mine.
It is important that the soil stay moist. The plants need moisture in order to germinate.
It takes around 5 -12 days for tomatoes to germinate. If you use a heat mat and keep the soil moist, the faster they will germinate.
Once the tomato seeds have emerged from the soil, they need light right away to avoid getting leggy. A sunny south or west facing window is best. If it is in your budget, look online for a $20-$40 grow light on Amazon. Honestly, the ones in that price range will work perfectly for a small set up. Do not leave the light on 24 hrs., plants need “rest” just like we do. 16 hrs is recommended for strong healthy plants.
After the seedlings are completely out of the soil I start putting a fan on them. This mimics wind and will make them stronger. I use a small clip fan that I clip to my shelf. You can also brush your hands over top of the seedlings if you do not have a fan.
After my tomatoes have formed their first set of true leaves I will pot them into a bigger container using a fluffy potting mix. (I like to use Pro-Mix).
I hope this helps you start your tomato seedlings! Best of luck!
If you have any question leave a comment below.
Follow me on Instagram @eager_gardener to keep up with my plant adventures this growing season!